Discerning the Transmundane is one of Skyrim‘s most elaborate and rewarding Daedric quests, sending players through some of the deepest Dwemer ruins in the game and eventually into the glowing depths of Blackreach. The quest intertwines with the main storyline, grants access to the Elder Scroll (Dragon), and culminates in a reward that can permanently boost five skills at once. It’s also notorious for sending players on a blood-hunting scavenger hunt across Tamriel, requiring samples from some of the rarest races in the game.
Whether you’re tackling this quest for the first time or returning after years away, this guide will walk you through every step, from locating Septimus Signus to maximizing your Oghma Infinium rewards. Expect Dwemer automata, puzzle mechanisms, and a whole lot of spelunking.
Table of Contents
ToggleKey Takeaways
- Discerning the Transmundane, a Daedric quest tied to Hermaeus Mora, culminates in the Oghma Infinium, which permanently boosts five skills across one of three paths and can shave hours off your leveling grind.
- Complete this quest at character level 15-20 minimum, bring adequate supplies (health/frost potions, lockpicks), and pair it with the Elder Knowledge main quest to maximize efficiency through Alftand and Blackreach.
- Collecting blood samples from five races (Falmer, Altmer, Bosmer, Dunmer, Orsimer) is required to open the Dwemer lockbox; Thalmor patrols and bandit camps offer the easiest guaranteed sources for most blood types.
- Time your Oghma Infinium usage strategically by waiting until your core skills reach 40-60 levels, then choose the skill path that matches your character build to avoid wasting the permanent bonus.
- Activate Great Lifts in Alftand, Mzinchaleft, and Raldbthar as you progress to unlock fast-travel points and avoid backtracking through lengthy dungeon sections.
- The quest is stable but occasionally suffers from bugs like unregistered blood samples or quest marker failures; PC players can use console commands, while console players should maintain multiple saves throughout this marathon dungeon crawl.
Quest Overview and How to Start Discerning the Transmundane
Discerning the Transmundane is a Daedric quest tied to Hermaeus Mora, the Daedric Prince of knowledge and memory. Unlike most Daedric quests, this one starts in an isolated location rather than at a shrine, and it’s almost impossible to miss if you’re following the main questline, since it overlaps directly with the Elder Knowledge quest.
The quest can be initiated in two ways. The most common path is through Elder Knowledge, the quest that sends you to find an Elder Scroll as part of Alduin’s Bane. When you speak to the College of Winterhold’s librarian, Urag gro-Shub, he’ll direct you to Septimus Signus. Alternatively, you can stumble upon Septimus’ outpost on your own and trigger the quest independently, though this is far less common.
Once started, the quest involves retrieving the Elder Scroll (Dragon) from the Tower of Mzark deep within Blackreach, then collecting blood samples from multiple races to unlock a Dwemer lockbox. The payoff? The Oghma Infinium, one of the most powerful skill-boosting items in the game.
Finding Septimus Signus’ Outpost
Septimus Signus lives in a frozen cave on the northern coast of Skyrim, far from civilization. The outpost is located north of the College of Winterhold, carved into an iceberg jutting out into the Sea of Ghosts. If you’re traveling manually, head northeast from Winterhold along the coastline, you’ll see the entrance as a small wooden door embedded in the ice.
Fast travel to Winterhold and follow the shore to save time. The outpost is marked on your map once the quest is active, so navigation is straightforward. Inside, you’ll find Septimus hunched over a Dwemer artifact, rambling about the Dwemer Lexicon and forbidden knowledge. Speak to him to receive your first objective: retrieve the Elder Scroll and inscribe a Dwemer Lexicon.
Quest Requirements and Level Recommendations
There’s no hard level requirement to start Discerning the Transmundane, but the dungeons involved, Alftand and Blackreach, are filled with high-level enemies. Expect to face Dwarven Spheres, Dwarven Spiders, Falmer, and Chaurus, many of which can hit hard if you’re under-leveled.
Recommended level: 15-20 minimum. Lower-level players can complete it with preparation, but you’ll need strong gear, plenty of potions, and ideally a follower or summon to tank damage. Stealth builds have an advantage in Alftand’s Falmer sections, while mages and archers can kite the slow-moving Dwarven automata.
Bring lockpicks, there are several locked chests and doors throughout Alftand. Stock up on health potions, resist frost potions (for Alftand’s traps), and soul gems if you rely on enchanted weapons. This is a long dungeon crawl, so prepare for a multi-hour session if you’re exploring thoroughly.
Step-by-Step Walkthrough: Retrieving the Elder Scroll
The bulk of Discerning the Transmundane takes place in the Dwemer ruin of Alftand, its connected zones, and the underground cavern of Blackreach. This is one of the longest dungeon sequences in the game, so pace yourself.
Navigating Alftand and Its Challenges
Alftand is located southwest of Winterhold, in the mountains. The entrance is clearly marked, and you’ll encounter a camp of dead adventurers outside, loot their bodies for some early gear and read the expedition notes to get a sense of what went wrong.
The dungeon is divided into three zones: Alftand Glacial Ruins, Alftand Animonculory, and Alftand Cathedral. Each zone is a gauntlet of Dwarven machines and Falmer. The Glacial Ruins introduce you to Dwarven Spiders and traps, watch for pressure plates and swinging blade traps, especially in narrow corridors. Use Detect Life or Clairvoyance if you’re struggling with navigation.
In the Animonculory, you’ll start encountering Falmer and Chaurus in greater numbers. Falmer are blind but detect sound and movement, so sneak attacks are highly effective. Dwarven Spheres appear here as well, these are tougher than Spiders and can close distance quickly. Bring shock-damage weapons or spells, as Dwarven automata are weak to lightning.
Alftand Cathedral is the final zone before Blackreach. Here, you’ll face Dwarven Centurions, towering constructs with high health pools and devastating steam attacks. Kite them, stay mobile, and aim for their weak spots. Once you clear the Cathedral, you’ll reach the Great Lift at Alftand, which provides a shortcut to the surface (useful for later).
Solving the Puzzles in Blackreach
Blackreach is a massive underground cavern filled with glowing mushrooms, Falmer camps, and more Dwemer ruins. It’s easy to get lost, but your objective is straightforward: reach the Tower of Mzark.
From the Alftand entrance into Blackreach, head east across the cavern. The Tower of Mzark is marked on your map once you’re inside. Along the way, you’ll encounter Falmer, Chaurus, and occasional Dwarven automata. You can avoid most fights by sticking to the edges of the cavern, but if you’re hunting for loot or XP, Blackreach is a goldmine.
There are no traditional puzzles between Alftand and the Tower, but Blackreach itself is labyrinthine. Use your map frequently and follow the quest marker. If you’re exploring, note that Blackreach connects to multiple other Dwemer ruins, Mzinchaleft, Raldbthar, and others, but you don’t need to clear them for this quest.
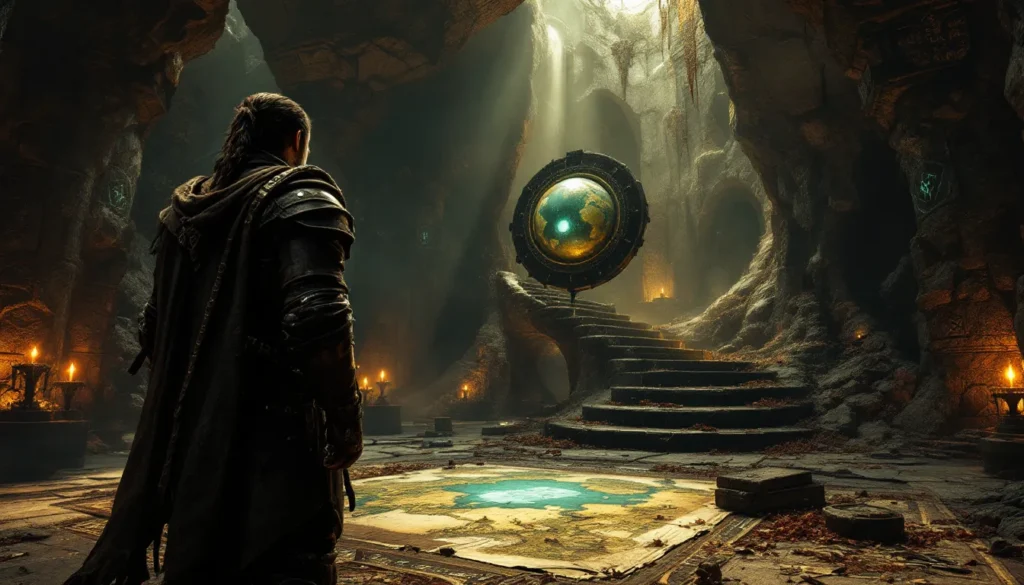
Accessing the Tower of Mzark
The Tower of Mzark is a vertical structure in the eastern section of Blackreach. The entrance is a set of large bronze doors, hard to miss once you’re close. Inside, you’ll find a multi-level chamber with a central Oculory, a Dwemer device used to reveal the Elder Scroll.
The puzzle here is mechanical, not combat-based. Approach the control panel near the Oculory and you’ll see five buttons: two on the right, two on the left, and one in the center. The solution is simple:
- Press the second button from the right on the bottom row four times.
- Press the second button from the left on the bottom row twice.
- Press the center button once.
This sequence focuses the Oculory’s lenses, revealing a hidden receptacle. Place the Blank Lexicon (given to you by Septimus) into the receptacle. The device will inscribe the Lexicon, and a mechanism will reveal the Elder Scroll (Dragon) in a tube overhead. Take both the inscribed Lexicon and the Elder Scroll.
After retrieving the scroll, use the elevator in the tower to reach the surface, it exits near Dawnstar, making fast travel back to Septimus much easier than retracing your steps through Blackreach.
Collecting Blood Samples for the Lexicon
Once you return to Septimus with the inscribed Lexicon, he’ll reveal the next step: opening a Dwemer lockbox using the blood of the Dwemer races. Since the Dwemer are extinct, the blood of their “false” descendants, Altmer, Bosmer, Dunmer, Falmer, and Orsimer, will suffice. You’ll receive a Dwemer Blood Extractor to harvest samples.
Each blood type requires you to loot a specific race’s corpse while the extractor is in your inventory. The game won’t always make it obvious when you’ve collected a sample, so check your quest log after looting.
Where to Find Each Blood Type
-
Falmer Blood: The easiest to obtain. If you just cleared Alftand and Blackreach, you likely already have this. Any Falmer corpse will work. If you need more, return to Blackreach or visit any Falmer-infested dungeon.
-
Altmer (High Elf) Blood: High Elves are common in major cities. The Thalmor Embassy is a guaranteed source if you’ve completed Diplomatic Immunity, but that’s main-quest locked. Alternatively, find Thalmor patrols on roads (common in the Reach and near Riften) or visit the College of Winterhold, several members are Altmer.
-
Bosmer (Wood Elf) Blood: Wood Elves are less common but not rare. Faendal in Riverwood is a Bosmer follower, though killing him tanks your reputation. Better options include bandit camps (check the Rift and Falkreath Hold) or Thalmor patrols, which sometimes include Bosmer agents.
-
Dunmer (Dark Elf) Blood: Dark Elves are abundant in Windhelm, Riften, and Raven Rock (if you have the Dragonborn DLC). Bandit camps in eastern Skyrim often have Dunmer members. Brelyna Maryon at the College is a Dunmer, but again, avoid killing friendly NPCs unless you’re committed to a chaotic playthrough.
-
Orsimer (Orc) Blood: Orcs are the trickiest if you haven’t encountered hostile ones. The Orc strongholds (Largashbur, Dushnikh Yal, Mor Khazgur, Narzulbur) are off-limits unless you’re friendly with them. Your best bet is bandit camps, several include Orc bandits. Check Halted Stream Camp north of Whiterun or Cracked Tusk Keep in the Reach.
Best Locations for Harvesting Rare Blood
If you’re struggling to find specific races, here are guaranteed sources:
- Thalmor Patrols: Spawn randomly on roads. Killing them yields Altmer and sometimes Bosmer blood. No bounty if you’re not seen.
- Liar’s Retreat: A bandit hideout in the Reach with a mixed-race crew, including Orcs and Bosmer.
- Blackreach: Return here for Falmer blood and occasional Dunmer/Orsimer corpses from previous adventurers.
- Any major city jail: Prisoners are often non-essential NPCs of various races. Morally questionable, but efficient.
Once you’ve collected all five blood samples, the extractor will combine them into a single “blood mixture.” Return to Septimus to proceed.
Returning to Septimus Signus and the Final Choice
With the blood mixture in hand, fast travel back to Septimus Signus’ Outpost. Give him the mixture, and he’ll use it to unlock the Dwemer lockbox. This triggers the final phase of the quest, and things get weird.
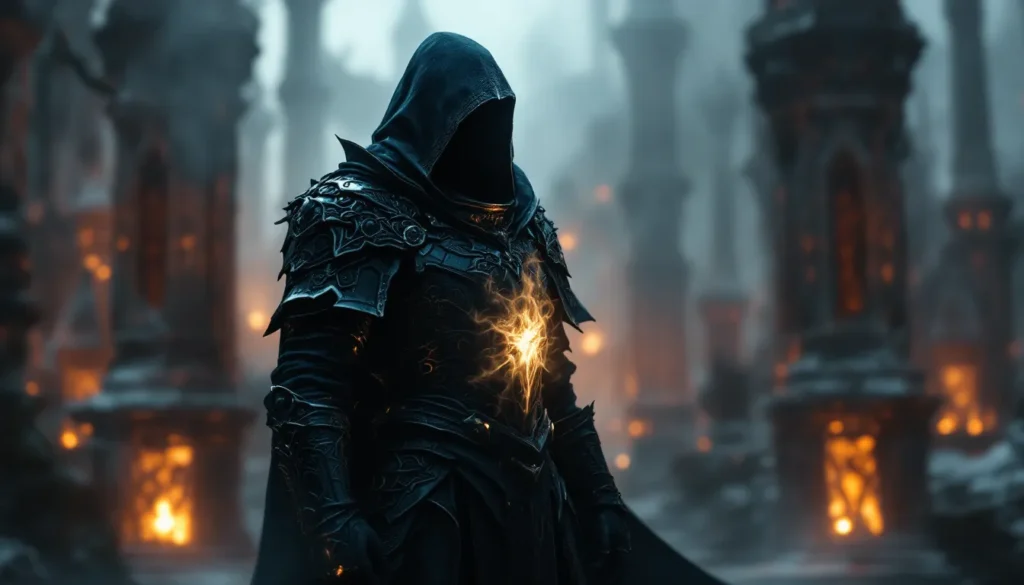
As Septimus opens the box, Hermaeus Mora manifests, revealing that the entire quest was a test of your worth. Septimus, having served his purpose, is consumed by Mora’s power and disintegrates into ash. The lockbox opens to reveal the Oghma Infinium, Hermaeus Mora’s artifact.
There’s no choice here in the traditional sense, you can’t save Septimus or refuse the book. The quest auto-completes once Mora speaks to you. Loot the Oghma Infinium from the lockbox and exit the outpost.
Understanding the Consequences of Your Decision
Unlike some Daedric quests, Discerning the Transmundane doesn’t offer moral branching. You receive the Oghma Infinium regardless of your actions, and Septimus’ death is scripted. The “consequence” is simply whether you choose to read the book and claim its power.
Reading the Oghma Infinium grants a permanent +5 boost to five skills, chosen based on one of three paths (detailed in the next section). There’s no downside to reading it, no debuffs, no bounty, no reputation loss. The only trade-off is that you can only use it once per playthrough (without exploits).
Note: Hermaeus Mora will remember you. If you have the Dragonborn DLC, this quest sets up your relationship with Mora for the Apocrypha storyline. Refusing the book isn’t an option, so if you’re roleplaying a character opposed to Daedric influence, consider this quest off-limits.
Quest Rewards: Oghma Infinium and Skill Boosts
The Oghma Infinium is the sole reward for Discerning the Transmundane, but it’s one of the most impactful items in the game. Reading it grants a permanent +5 boost to five skills, chosen from one of three paths:
- Path of Might: Increases Heavy Armor, One-Handed, Two-Handed, Archery, Block, and Smithing.
- Path of Shadow: Increases Light Armor, Sneak, Lockpicking, Pickpocket, Speech, and Alchemy.
- Path of Magic: Increases Destruction, Restoration, Conjuration, Illusion, Alteration, and Enchanting.
Each path boosts all the skills in that category, not just five. This makes the Oghma Infinium incredibly valuable for min-maxers, especially if you’re trying to hit skill caps or unlock specific perks quickly.
How to Maximize the Oghma Infinium Benefit
Timing is everything. Don’t read the Oghma Infinium early in your playthrough, you’ll waste its potential on low-level skills that are easy to grind naturally. Instead, wait until your core skills are in the 40-60 range, where leveling slows down. The +5 boost will feel more significant and save hours of grinding.
Match the path to your build. If you’re a stealth archer, Path of Shadow is the obvious choice. Heavy melee builds should pick Path of Might. Pure mages benefit most from Path of Magic. Hybrid builds have a tougher call, prioritize the path that covers your weakest or slowest-leveling skills.
Legendary skill exploit: If you’ve reset a skill to Legendary (making it level 15 again), the Oghma Infinium’s +5 boost still applies. This means you can push a Legendary skill back to 20 instantly, speeding up the re-leveling process. But, many players consider this exploit-adjacent, so use your judgment.
The book itself is a quest item until you read it, so it won’t clutter your inventory long-term. Once read, it disappears. There’s no way to store it for later or transfer it to another character without console commands or mods.
No other tangible rewards come from this quest, no gold, no unique weapons. The Oghma Infinium is the prize, and for skill-focused players, it’s worth every second of the Blackreach slog.
Common Bugs, Glitches, and How to Fix Them
Discerning the Transmundane is one of the more stable quests in Skyrim, but it’s not immune to bugs, especially in older versions or heavily modded playthroughs. Here are the most common issues and how to resolve them.
Blood samples not registering: Occasionally, looting a corpse with the Dwemer Blood Extractor in your inventory won’t trigger the collection. This is usually caused by looting before the quest updates. Fix: Drop the extractor, pick it up again, then loot a fresh corpse of the required race. If that fails, reload an earlier save.
Septimus won’t take the Lexicon: Rare, but sometimes Septimus refuses to accept the inscribed Lexicon after you retrieve it from the Tower of Mzark. This is often a dialogue bug. Fix: Try exiting and re-entering the outpost, waiting 24 in-game hours, or loading an autosave from just before entering. If you’re on PC, use the console command setstage DA04 50 to advance the quest manually.
Oghma Infinium duplication exploit (patched): In early versions of Skyrim (pre-patch 1.9), players could duplicate the Oghma Infinium by storing it on a bookshelf before reading it, allowing infinite skill boosts. This has been patched in Special Edition and Anniversary Edition, but some community mods restore the exploit for those who want it.
Blackreach navigation bugs: Quest markers in Blackreach sometimes point to the wrong location or fail to update. This is usually a pathfinding issue. Fix: Exit Blackreach entirely (via one of the Great Lifts), then re-enter. The marker should recalibrate. Alternatively, use Clairvoyance to trace a path.
Hermaeus Mora doesn’t appear: At the very end of the quest, Mora’s dialogue should trigger automatically when Septimus opens the lockbox. If it doesn’t, the quest may soft-lock. Fix: Reload a save from before giving Septimus the blood mixture. If you’re on PC, use setstage DA04 100 to force-complete the quest and spawn the Oghma Infinium.
For console players, most bugs require a reload. Always keep multiple saves during long quest chains like this one. PC players have the console as a safety net, don’t hesitate to use it if a bug blocks progress.
Tips and Strategies for Completing the Quest Efficiently
Discerning the Transmundane is a marathon, not a sprint. Here’s how to streamline the experience and avoid unnecessary backtracking.
Combine with Elder Knowledge: If you’re following the main questline, do this quest when Elder Knowledge prompts you. You’ll complete two objectives simultaneously, saving a trip through Alftand.
Use the Great Lifts: Alftand, Mzinchaleft, and Raldbthar all have Great Lifts that connect Blackreach to the surface. Activate them as you pass, they unlock fast-travel points and make future visits (for blood collection or exploration) much faster.
Stock up before entering Alftand: Don’t rely on finding supplies in the dungeon. Bring at least 20 health potions, 10 lockpicks, and resist frost potions. If you’re a caster, bring magicka potions or invest in the Respite perk (Restoration) to restore stamina with healing spells.
Bring a follower with high carry weight: Alftand and Blackreach are packed with Dwemer scrap metal, soul gems, and valuable loot. Followers like Lydia or Faendal can haul extra weight. Alternatively, summon Arvak (if you have Dawnguard) for on-demand storage.
Don’t rush Blackreach: If you have time, explore. Blackreach contains unique loot, including Crimson Nirnroot (30 plants for the A Return to Your Roots quest) and several skill books. The central glowing orb can be hit with Unrelenting Force to summon a dragon, worth doing for the soul and scales.
Plan your blood collection route: Before leaving Blackreach, decide which races you still need. If you’re missing Orc or Bosmer blood, plan a route through bandit camps or strongholds rather than wandering aimlessly. Fast travel to major cities for easy High Elf/Dark Elf targets.
Recommended Character Builds and Equipment
Stealth Archer: Dominates this quest. Sneak attacks one-shot Falmer, and you can kite Dwarven automata from range. Bring a Dwarven Bow or better, and stock up on arrows. The Muffle enchantment trivializes Falmer sections.
Heavy Melee: Viable but slower. Dwarven Centurions hit hard, so invest in high armor rating and the Block skill. Bring a shield and a weapon with shock enchantment. The Elemental Protection perk (Block tree) helps against steam attacks.
Mage: Effective if you balance offense and defense. Use Chain Lightning or Ice Storm for AoE damage against Falmer swarms. Bring an Atronach (Frost or Storm) to tank Centurions. Ebonyflesh or equivalent armor spells are mandatory.
Equipment tips: Shock-enchanted weapons wreck Dwarven automata. Bring a follower with a two-hander to draw aggro. If you’re under-leveled, use Invisibility potions or scrolls to skip tough fights entirely, most of Alftand’s enemies respawn, so there’s no shame in avoiding them.
Finally, save often. Alftand has several points of no return, and dying deep in Blackreach without a recent save means losing hours of progress.
Conclusion
Discerning the Transmundane is one of Skyrim’s most memorable quests, blending deep lore, challenging dungeons, and a genuinely impactful reward. The Oghma Infinium’s +5 skill boost can shave hours off your leveling grind, making the trek through Alftand and Blackreach well worth the effort. The quest also introduces you to Hermaeus Mora, setting up storylines that pay off in the Dragonborn DLC.
Whether you’re chasing the Elder Scroll for the main quest or hunting Daedric artifacts for completionism, this quest delivers. Just remember to prepare thoroughly, save often, and plan your Oghma Infinium use carefully. And if you’re stuck on blood collection or puzzle solutions, don’t hesitate to backtrack or consult your notes, Skyrim rewards patience and thoroughness.
Now get out there, crack open that Dwemer lockbox, and claim your forbidden knowledge. Hermaeus Mora is waiting.