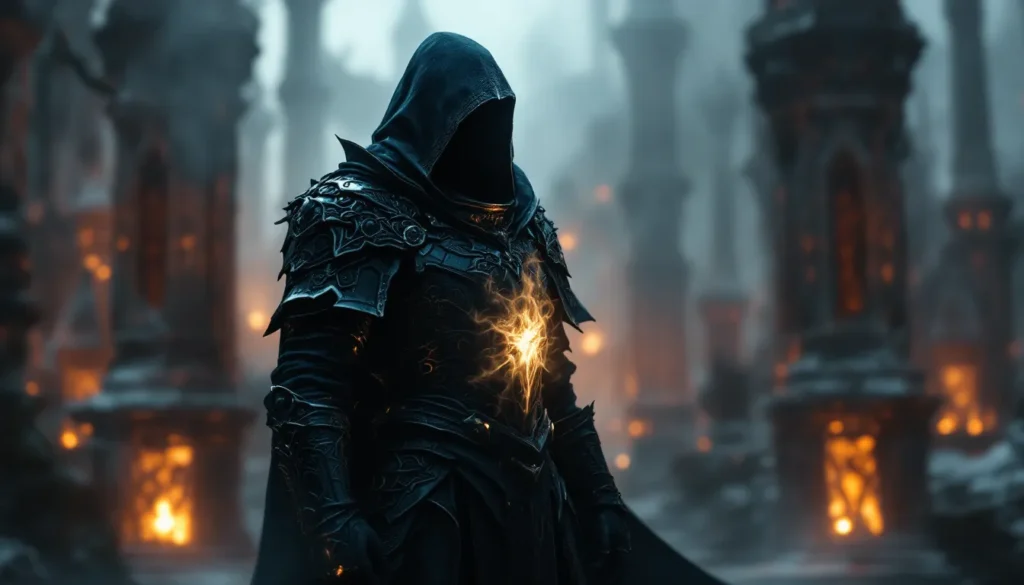
Morokei’s mask, officially known as the Mask of Winter or simply Morokei in most inventories, remains one of the most sought-after Dragon Priest masks in Skyrim even fifteen years after release. Its potent magicka regeneration enchantment makes it a cornerstone piece for mage builds, but getting to it means surviving Labyrinthian’s gauntlet of draugr, traps, and one seriously angry priest. Whether playing the Anniversary Edition on PS5 or a modded Special Edition on PC, this mask is still worth the trek.
This guide covers everything from the lore behind Morokei to exact stat breakdowns, step-by-step retrieval instructions, optimal builds, and advanced synergy tactics. Players will also find comparisons against other Dragon Priest masks and common pitfalls to dodge. Let’s break it down.
Table of Contents
ToggleKey Takeaways
- The Mask of Winter (Morokei) doubles your magicka regeneration rate to 6% per second, making it essential for pure mage builds focused on sustained spellcasting.
- Claim Morokei during the College of Winterhold’s ‘The Staff of Magnus’ quest by navigating Labyrinthian’s multi-level dungeon and defeating the Dragon Priest boss in the Inner Sanctum.
- Pair the Mask of Winter with Archmage’s Robes and custom Fortify Magicka Regen enchantments to stack regeneration multiplicatively, enabling near-instant magicka refills and infinite spell casting.
- Avoid equipping Morokei with full Light Armor, as the mask’s Heavy Armor classification breaks Light Armor set bonuses; commit to Heavy Armor or accept the penalty for mages using robes.
- Stack magic resistance buffs (Agent of Mara, Alteration perks, Breton racial) alongside Morokei to reach the 85% resistance cap and survive the Dragon Priest’s lightning attacks.
- For hybrid and non-mage builds, consider Krosis (stealth archers), Rahgot (melee), or Konahrik (versatile) as superior alternatives to the Mask of Winter.
What Is the Mask of Winter in Skyrim?
Lore and Background of the Mask of Winter
Morokei was one of the eight named Dragon Priests who ruled Skyrim during the height of the Dragon Cult’s power. His name translates roughly to “Glorious” in the dragon tongue, though his reputation is anything but benevolent. According to in-game texts and environmental storytelling in Labyrinthian, Morokei was tasked with guarding powerful magical artifacts and knowledge, specifically, he was bound to protect the Staff of Magnus after it was hidden within the ruins.
Unlike some Dragon Priests who were entombed with honor, Morokei’s imprisonment appears more punitive. He’s found in the deepest chamber of Labyrinthian, magically draining two mages who’ve been trapped in spectral form for centuries. The College of Winterhold questline “The Staff of Magnus” forces a confrontation with him, making his mask one of the few Dragon Priest masks players are guaranteed to encounter during a major faction quest.
The mask itself is a visual hybrid, ornate gold and blue enamel work typical of Dragon Priest regalia, with stylized features that hint at frost magic themes even though the actual enchantment being magicka-focused.
Stats and Enchantments Explained
The Mask of Winter (Morokei) provides the following base stats in unmodded Skyrim Special Edition and Anniversary Edition:
- Armor Rating: 23 (Heavy Armor classification)
- Weight: 9
- Base Value: 1607 gold
- Enchantment: Magicka regenerates 100% faster
That enchantment is the real prize. In practical terms, it doubles your magicka regeneration rate, stacking multiplicatively with other regeneration buffs from perks, potions, and gear. For context, base magicka regeneration in Skyrim is 3% of your total magicka pool per second. With Morokei equipped, that jumps to 6% per second before any other modifiers.
The mask counts as Heavy Armor, which matters for perk synergy. Players running Light Armor builds will miss out on matching set bonuses, though the enchantment is often powerful enough to justify the trade-off. It cannot be disenchanted, attempting to do so at an arcane enchanter will yield no result, and it cannot be improved at a workbench without mods or exploits.
One quirk: the mask has no inherent resistances or secondary effects. It’s purely a magicka regeneration tool, making it hyper-specialized compared to masks like Nahkriin (which boosts spell effectiveness) or Krosis (which spreads bonuses across multiple skills).
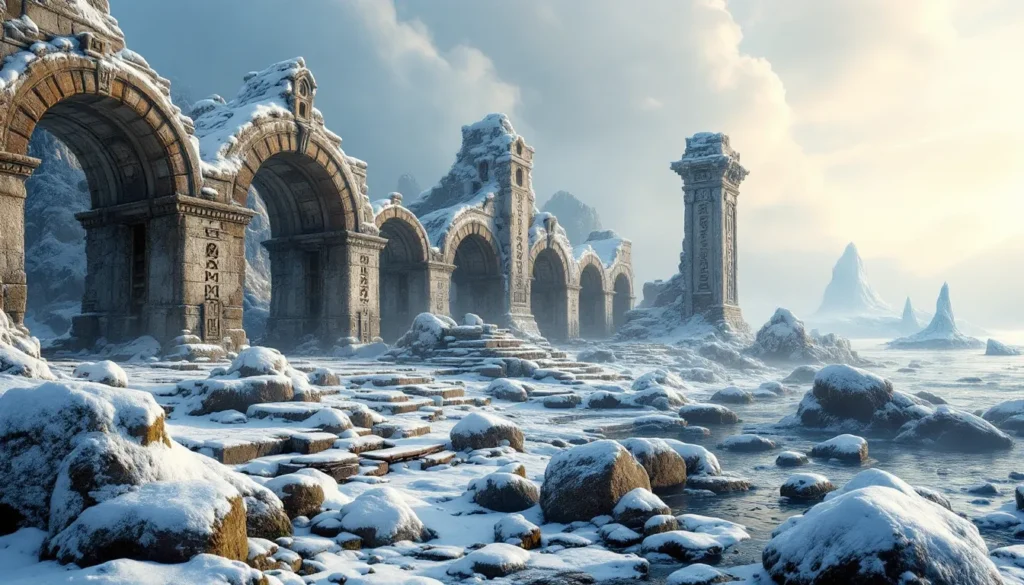
How to Find the Mask of Winter: Step-by-Step Location Guide
Preparing for the Journey to Labyrinthian
Labyrinthian is located in the mountains of Hjaalmarch Hold, southeast of Morthal and directly south of the College of Winterhold. The ruins are accessible as soon as the player discovers them, but the interior dungeon containing Morokei is locked behind the College of Winterhold questline. Specifically, players must progress to the quest “The Staff of Magnus” to gain the Torc of Labyrinthian, the key required to open the main entrance.
Before heading out, prepare for a lengthy dungeon crawl:
- Level recommendation: 25+ on Adept difficulty: 30+ on Expert or above
- Enemy types: Draugr (including Deathlords and Scourges), Skeletal Dragons, Frost Trolls, and of course Morokei himself
- Resistances needed: Frost resistance is helpful but not mandatory: magic resistance is more critical for Morokei’s lightning attacks
- Gear: Bring plenty of healing potions, magicka potions if playing a caster, and consider carrying a bow for distant targets in the open courtyard sections
Fast travel to Labyrinthian or take a carriage to Morthal and head southeast. The exterior features a massive Nordic ruin with scattered draugr and a Skeletal Dragon that spawns in the courtyard, clear this area first or you’ll have it harassing you while navigating exposed pathways.
Navigating Labyrinthian’s Deadly Traps and Enemies
Once inside, Labyrinthian is a multi-level dungeon with several named sub-zones: Labyrinthian Chasm, Labyrinthian Thoroughfare, Labyrinthian Tribune, and finally the Labyrinthian Inner Sanctum where Morokei waits. The dungeon is dense with traps, pressure plates trigger dart launchers, swinging blade traps, and collapsing floors. Move carefully and watch for suspicious floor textures.
Key navigation tips:
- Chasm section: Features narrow bridges over lava-filled pits. Draugr archers will spawn on elevated platforms: use Unrelenting Force or ranged attacks to knock them down.
- Thoroughfare and Tribune: Expect heavy draugr resistance, including Deathlords wielding ebony weapons. Use choke points and doorways to funnel enemies.
- Spectral Draugr: These glowing enemies are tougher than standard draugr and often appear in groups. They’re immune to most Illusion spells, so rely on direct damage or summons.
- Word Wall: There’s a Word of Power for Dismay (a shout that causes enemies to flee) in the Tribune section, worth grabbing before the final fight.
The dungeon takes roughly 45 minutes to clear thoroughly, longer if looting every urn and chest. Stamina management is key for melee builds: consider bringing Vegetable Soup for infinite power attacks and shield bashes.
Defeating Morokei to Claim the Mask
Morokei awaits in the Labyrinthian Inner Sanctum, standing atop a raised platform while draining two ethereal mages named Savos Aren (a ghostly projection of the former Arch-Mage) and Atmah. These mages are invulnerable until Morokei is defeated, they cannot be freed early, and they provide Morokei with a massive magic shield that regenerates his health rapidly.
Boss mechanics:
- Health: Scales with player level but averages around 1200-1500 HP at level 30
- Primary attacks: Chain Lightning (high damage AOE), Lightning Bolt, Ice Storm
- Staff usage: Morokei wields the Staff of Magnus, which drains magicka and health if you’re caught in the beam
- Regeneration: The two mages provide constant healing: Morokei will regenerate faster than you can damage him unless you break line of sight between him and the mages
Winning strategy:
- Position the mages: The mages’ beams are directional. Morokei must face them to receive healing. Circle around pillars to force Morokei to turn his back to the mages, breaking the connection temporarily.
- Burst damage windows: When the shield drops (visual cue: the glowing aura around Morokei fades), unload your highest DPS, power attacks, master-level Destruction spells, or rapid bow shots.
- Magic resistance: Equip the Agent of Mara blessing, Resist Magic enchantments, or potions. His lightning attacks can one-shot squishy builds on higher difficulties.
- Summons: Atronachs and Dremora Lords are excellent distractions. They’ll tank lightning bolts while you deal damage from safety.
- Exploit pillars: The arena has several stone columns. Use them for cover and to kite Morokei if overwhelmed.
Once Morokei falls, the two mages vanish with cryptic dialogue. Loot his corpse for the Mask of Winter (Morokei), the Staff of Magnus (required to complete the College quest), and leveled loot. The mask auto-equips to your inventory, claim it and fast travel out via the shortcut door that opens behind the boss platform.
Best Character Builds and Playstyles for the Mask of Winter
Mage Builds: Maximizing Magicka Regeneration
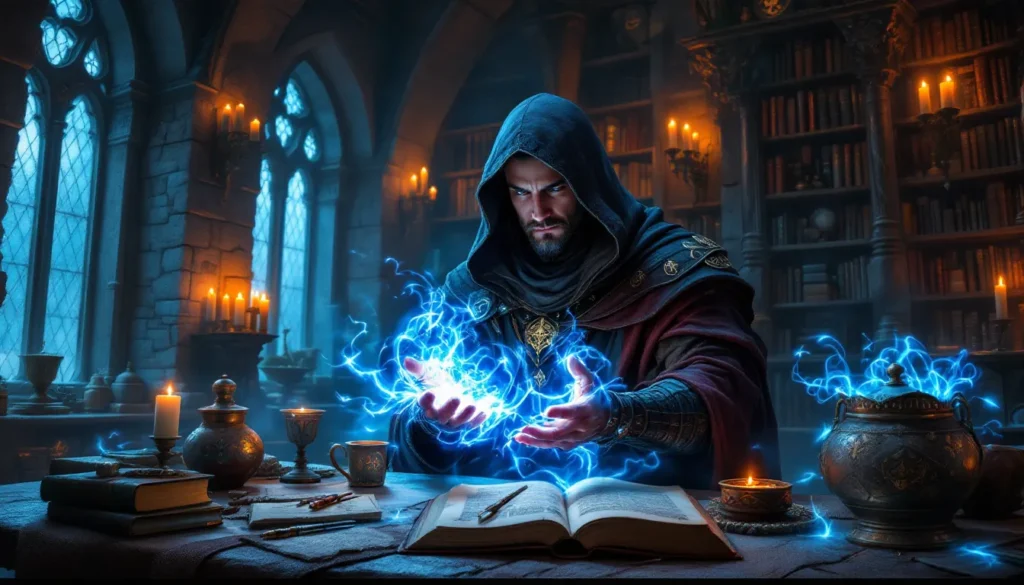
Morokei is tailor-made for pure mage builds focused on sustained spellcasting. The 100% magicka regeneration buff allows near-continuous use of Destruction spells, extended Conjuration summons, and aggressive Restoration usage without relying on potions.
Optimal perk synergies:
- Destruction: Recovery (2/2) perk reduces spell costs by 50%. Combined with Morokei’s regen, you’ll rarely bottom out your magicka pool even spamming master-level spells like Lightning Storm.
- Alteration: Magic Resistance (3/3) and Atronach perks. The Atronach perk provides 30% spell absorption, making you tanky enough to survive close-quarters combat.
- Restoration: Regeneration perk doubles healing spell effectiveness. Pair with Morokei for emergency clutch heals mid-fight.
- Enchanting: Stack Fortify Magicka enchantments on robes, rings, and amulets. Aim for 400+ base magicka before percentage buffs. The regeneration scales with your total pool, so bigger magicka = faster raw regen.
Gear pairings:
- Body: Archmage’s Robes (100% magicka regen, +50 magicka, all spells cost 15% less). This stacks with Morokei for 200% total regen before perks.
- Hands: Gloves of the Savant or custom Fortify Magicka/Magicka Regen enchantments.
- Ring & Amulet: Fortify Destruction + Fortify Magicka Regen. Crafted enchantments with max Enchanting perks can push regen to absurd levels.
- Weapon: Staff of Magnus or a crafted staff for free ranged damage when conserving magicka.
Race picks: Bretons get a 25% magic resistance racial, stacking beautifully with Alteration perks. High Elves start with +50 magicka and Highborn ability (regen magicka faster for 60 seconds once per day), though Highborn becomes redundant with Morokei late-game.
Hybrid Builds: Battlemage and Spellsword Options
Battlemages (heavy armor + magic) benefit from Morokei even though the Heavy Armor classification clash with typical mage robes. The mask itself is Heavy Armor, so it contributes to the Matching Set perk if wearing a full Heavy Armor loadout. This lets players build tankier casters who can wade into melee range.
Battlemage setup:
- Armor: Full Daedric or Dragonplate Heavy Armor with Fortify Magicka Regen enchantments on gauntlets and boots.
- Weapon: One-handed weapon (mace or sword) in the right hand, Destruction spell in the left. Use the Elemental Fury shout for rapid strikes or rely on spell-sword combos.
- Perks: Split between One-Handed, Heavy Armor, Destruction, and Restoration. Prioritize Juggernaut (5/5) in Heavy Armor for max defense and Recovery in Destruction for spell cost reduction.
- Playstyle: Open with ranged Destruction spells, then close for melee finishers. Morokei ensures you always have magicka for emergency wards or healing.
Spellswords (light armor + magic + one-handed weapons) can also use Morokei, though it breaks Light Armor set bonuses. The trade-off is often worth it if magicka sustain is a bottleneck. Pair with Nightingale Armor or Glass Armor for high defense and use Bound Sword to save a weapon slot, Bound Sword scales with Conjuration perks and Morokei keeps your magicka pool topped off for recasting.
Players invested in character build optimization often experiment with hybrid Heavy Armor mage setups using Morokei as the cornerstone piece, balancing survivability with spellcasting power.
Comparing the Mask of Winter to Other Dragon Priest Masks
How Morokei Stacks Up Against Nahkriin, Krosis, and Konahrik
Skyrim features eight named Dragon Priest masks plus the ultimate mask, Konahrik, obtained by placing all eight on the shrine in Labyrinthian’s central chamber. Here’s how Morokei compares to top-tier alternatives:
| Mask | Enchantment | Best For | Armor Rating |
|---|---|---|---|
| Morokei | +100% Magicka Regeneration | Pure mages, sustained spellcasting | 23 |
| Nahkriin | -20% cost for Destruction/Restoration, +50 Magicka | Destruction-focused mages | 23 |
| Krosis | +20% Alchemy, Archery, Lockpicking | Stealth archers, alchemists | 23 |
| Konahrik | Chance to heal wearer + damage nearby enemies at low health | All builds (jack-of-all-trades) | 27 |
| Volsung | +20% prices, Waterbreathing, +20 carry weight | Utility/merchants | 23 |
| Rahgot | +70 Stamina | Melee/tank builds | 27 |
Morokei vs. Nahkriin: Nahkriin is Morokei’s closest competitor for mages. The 20% cost reduction for Destruction and Restoration is powerful, especially when stacked with other cost reduction gear (you can hit 0% casting cost with enough enchantments). But, Morokei’s regen allows more aggressive playstyles and benefits all spell schools, not just two. For players using Conjuration, Illusion, or Alteration heavily, Morokei wins.
Morokei vs. Krosis: Krosis is the stealth archer’s dream but irrelevant for mages. If running a hybrid archer-mage, Krosis edges out Morokei, but pure casters gain nothing from Alchemy/Lockpicking/Archery buffs.
Morokei vs. Konahrik: Konahrik is the “final boss” mask, requiring all eight Dragon Priest masks to unlock. Its heal-on-low-health proc and AOE damage make it universally useful, but it doesn’t enhance magicka efficiency. For pure mage builds prioritizing offense and spell sustain, Morokei is superior. For balanced builds that value survivability, Konahrik takes the crown.
When to Choose the Mask of Winter Over Alternatives
Use Morokei when:
- Running a pure mage build that relies on constant spellcasting (Destruction spam, summoning multiple Atronachs, chain-casting Wards).
- You haven’t maxed Enchanting yet. Late-game custom enchantments can achieve similar magicka regen, but Morokei is available mid-game and doesn’t require Enchanting 100.
- Playing on Legendary difficulty where magicka efficiency is life-or-death. The regen lets you cast defensive spells (Wards, Flesh spells) while maintaining offensive pressure.
- You want to stack regen to absurd levels. Combine Morokei + Archmage’s Robes + custom Fortify Magicka Regen enchantments + Alteration’s Recovery perk for near-instant magicka refills.
Switch to alternatives when:
- You’ve crafted cost-reduction gear that reduces Destruction/Restoration spells to 0% cost. At that point, regen is irrelevant, and Nahkriin’s +50 magicka becomes more valuable.
- Running a hybrid build where the Heavy Armor classification breaks your set bonuses and you need Light Armor perks.
- You’ve unlocked Konahrik and value survivability over raw DPS. Konahrik’s heal proc can clutch fights that Morokei’s regen can’t save.
For detailed tier list breakdowns comparing Dragon Priest masks across different playstyles, the community consensus places Morokei in S-tier for mages, A-tier overall.
Advanced Tips and Tricks for Using the Mask of Winter
Combining with Enchantments and Gear Sets
To squeeze every drop of power from Morokei, players need to understand how magicka regeneration stacking works in Skyrim. Regen buffs are multiplicative, not additive, meaning each source multiplies the previous total rather than adding flat percentages.
Example calculation:
- Base magicka regen: 3% of total magicka per second
- Morokei: 100% faster regen = 6% per second
- Archmage’s Robes: 100% faster regen = 12% per second
- Custom ring + amulet with 40% Fortify Magicka Regen each: ~16-17% per second
- Alteration Recovery perk (2/2): Additional 50% = ~24-25% per second
At 400 total magicka, that’s roughly 100 magicka per second regenerating passively. Add in the Equilibrium spell (trades health for magicka) and Respite perk (healing spells restore stamina), and you’ve built a self-sustaining loop.
Gear set example:
- Head: Morokei
- Body: Archmage’s Robes (or custom Fortify Magicka Regen + Fortify Destruction robes via Enchanting 100)
- Hands: Custom gauntlets with Fortify Magicka Regen + Fortify Magicka
- Feet: Custom boots with Fortify Magicka Regen + Fortify Stamina (stamina for sprinting between fights)
- Ring: Fortify Magicka Regen + Fortify Destruction
- Amulet: Fortify Magicka Regen + Fortify Restoration
- Weapon: Staff of Magnus (free ranged attacks) or enchanted dagger with Absorb Magicka (melee magicka steal)
This setup makes you nearly unkillable in prolonged fights. You can spam wards to tank damage, heal through injuries, and maintain offensive pressure indefinitely.
Exploiting Magicka Regeneration for Infinite Spellcasting
With high enough magicka regen, certain spell combos become effectively free:
- Destruction spam: Incinerate, Thunderbolt, and Icy Spear cost 75-90 magicka per cast. With 100+ magicka per second regen, you can cast one every 1-2 seconds indefinitely.
- Permanent summons: Dremora Lords cost 358 magicka and last 60 seconds. With Morokei + Archmage’s Robes, you’ll regen enough magicka to resummon before the first expires, maintaining two permanent summons with Twin Souls perk.
- Ward tanking: Greater Ward costs 84 magicka per second to maintain. With 100+ regen, you can hold it indefinitely while allies or summons kill enemies.
- Healing loop: Fast Healing costs 67 magicka. Cast it once per second to outheal most incoming damage on lower difficulties.
Exploit warning: On PC, the Fortify Restoration loop (using Fortify Restoration potions to boost enchantments, then crafting stronger potions, repeat) can push magicka regen into absurd ranges (1000+ per second). This trivializes all combat and is widely considered an exploit/cheat. Use at your own discretion if you want to preserve challenge.
Another advanced tactic: pair Morokei with the Atronach Stone (50% spell absorption, -50% magicka regen). The regen penalty is offset by Morokei + gear, and the spell absorption makes you nearly immune to magic. Add the Atronach perk from Alteration for 80% total absorption, enemy mages become free magicka batteries.
Common Mistakes to Avoid When Using the Mask of Winter
Ignoring Heavy Armor classification: New players often equip Morokei with full Light Armor or robes, then wonder why they’re squishy. The mask is Heavy Armor, which breaks Light Armor’s Matching Set bonus (25% armor rating boost). If running Light Armor perks, you’re penalized. Either commit to Heavy Armor on other slots or accept the trade-off. For pure mages, robes + Morokei is still optimal since mages don’t invest in armor perks anyway.
Over-relying on regen without cost reduction: Magicka regeneration doesn’t kick in during spellcasting. If you’re chain-casting Destruction spells, regen only applies between casts. Cost reduction (via enchantments or perks) is often more impactful for sustained DPS. Morokei shines in fights with breathing room, kiting, using summons, or alternating between offense and defense. In pure DPS races, cost reduction wins.
Forgetting to recharge the enchantment: Wait, this is a trick entry, Dragon Priest masks have permanent enchantments that never need recharging. But many players mistakenly try to recharge them at soul gem altars, wasting clicks. The enchantment is baked in and infinite.
Not upgrading via Smithing exploits (console): While the mask can’t be improved at a workbench normally, console players can use the Fortify Restoration loop to create absurdly powerful Fortify Smithing potions/enchantments, then “improve” the mask through reverse-pickpocket exploits or follower inventory glitches. PC players have console commands (player.setav lightarmor X or player.modav commands) to manually buff stats. This is exploit territory, but it’s an option for players who’ve exhausted vanilla content.
Neglecting magic resistance: Morokei provides zero defensive stats beyond armor rating. Mages often run low health pools, making them vulnerable to magic attacks. Always pair Morokei with magic resistance buffs, Agent of Mara (15% from Mara’s quest), Lord Stone (25% magic resistance + 50 armor), Alteration’s Magic Resistance perks (30%), Breton racial (25%). Stack these to hit the 85% resistance cap and become nearly immune to enemy spells.
Using it on non-mage builds: Morokei is hyper-specialized. Stealth archers, two-handed warriors, and sword-and-board tanks gain almost nothing from magicka regen. Don’t equip it just because it’s a Dragon Priest mask, use Krosis, Rahgot, or Konahrik instead for those playstyles.
Mod Recommendations to Enhance the Mask of Winter Experience
Visual overhauls: Vanilla Dragon Priest masks look dated by 2026 standards. Mods like Masks of the Dovah Sonaak (available on Nexus Mods) retexture all Dragon Priest masks with 4K textures, improved normal maps, and enhanced metallic shading. Morokei gets a frostier, more ethereal look that matches its “Winter” theme better.
Gameplay rebalances: Mods like Vokrii – Minimalistic Perks of Skyrim or Ordinator – Perks of Skyrim rework the perk trees, making magicka regen even more valuable. Ordinator adds perks that convert excess magicka regen into spell power or shield strength, turning Morokei into an offensive and defensive powerhouse. Another mod, Apocalypse – Magic of Skyrim, adds 155+ new spells that synergize beautifully with high magicka regen builds, spells like “Ocato’s Recital” (auto-casts buffs when entering combat) become permanent uptime with Morokei.
Bug fixes: The Unofficial Skyrim Special Edition Patch (USSEP) fixes several Dragon Priest AI bugs, including Morokei’s occasional pathing issues where he gets stuck behind the mage-draining pillars. Essential for a smooth boss fight.
Difficulty overhauls: For players who find vanilla Skyrim too easy even on Legendary, Requiem – The Roleplaying Overhaul or Wildcat – Combat of Skyrim make Morokei a legitimate endgame challenge. Requiem turns Labyrinthian into a level 40+ dungeon with one-shot mechanics: claiming Morokei becomes a true achievement.
Alternate start mods: Live Another Life lets players skip the Helgen intro and start as a College of Winterhold student, fast-tracking access to the Labyrinthian quest. Useful for players rerolling mage characters who want Morokei ASAP.
Armor mods: Immersive Armors adds lore-friendly Heavy Armor sets that match Morokei’s aesthetic, Dark Seducer Armor, Daedric Mage Armor, etc. For players committed to Heavy Armor mage builds, these sets provide better synergy than vanilla options.
Console players: Xbox and PlayStation have limited mod support, but Kontrol (graphical overhaul) and Ordinator are both available on console. For PS4/PS5 players restricted to mods that don’t use external assets, options are slim, stick to perk overhauls and gameplay tweaks rather than visual mods.
Conclusion
Morokei’s mask remains a cornerstone item for Skyrim mages more than a decade after launch, and for good reason. The 100% magicka regeneration enchantment enables aggressive, sustained spellcasting that defines high-level mage gameplay, whether running vanilla content on console or a heavily modded setup on PC. From the tense boss fight in Labyrinthian’s depths to the endgame synergy with Archmage’s Robes and custom enchantments, this Dragon Priest mask earns its spot in S-tier gear lists.
Players should prioritize claiming it mid-game during the College of Winterhold questline, experiment with hybrid builds to find the best fit, and avoid common pitfalls like ignoring Heavy Armor classification or neglecting magic resistance. With the right setup, Morokei transforms any mage into an unstoppable force capable of chain-casting master-level spells, maintaining permanent summons, and outlasting any enemy through sheer magicka efficiency. Whether hunting down all eight Dragon Priest masks for Konahrik or building the ultimate destruction mage, Morokei is non-negotiable.