Heavy armor in Skyrim transforms fragile adventurers into walking fortresses capable of shrugging off dragon fire and giant clubs alike. While light armor users dart around like agile rogues, heavy armor wearers stand their ground, turn combat into a war of attrition, and emerge victorious through sheer durability. Whether you’re brawling with bandits in Bleak Falls Barrow or facing down Alduin himself, mastering the heavy armor skill line is essential for anyone building a tank-focused character.
This guide covers everything from the skill tree’s best perks to optimizing armor sets, leveling strategies, and build synergies. If you’ve ever wanted to charge headfirst into battle without worrying about your health bar, you’re in the right place.
Table of Contents
ToggleKey Takeaways
- Skyrim heavy armor offers the highest base armor rating and reaches the 567 armor cap more easily than light armor, providing up to 80% physical damage reduction when optimized with smithing and enchanting.
- Essential perks like Juggernaut (ranks 1-5), Conditioning, and Tower of Strength form the foundation of heavy armor builds, with Juggernaut providing up to 100% armor rating boost when fully unlocked.
- Endgame heavy armor sets like Daedric and Dragonplate armor become viable with proper upgrades to Legendary quality, far outperforming lower-tier sets when combined with Fortify Smithing potions and gear.
- Level heavy armor quickly by engaging moderate-damage enemies like draugr and bandits in sustained combat, using exploits like the mudcrab method and Flame Atronach summoning for efficient skill progression.
- Heavy armor pairs best with two-handed warrior builds, sword-and-shield tanks, and battle mage hybrids, each requiring different perk priorities and enchantments for maximum survivability.
- Avoid common mistakes like neglecting armor upgrades, mixing light and heavy armor pieces (breaking set bonuses), and stacking enchantments past the armor cap instead of investing in magic resistance and health.
Why Heavy Armor Is the Best Choice for Tanky Builds
Heavy armor offers the highest base armor rating in Skyrim, making it the gold standard for players who want to absorb punishment rather than avoid it. Each piece provides significantly more protection than its light armor counterpart, and the skill tree is designed to amplify survivability through perks that reduce incoming damage, reflect melee attacks, and even grant stamina regeneration.
Unlike light armor, which rewards dodging and mobility, heavy armor encourages an aggressive, frontline playstyle. You’re meant to stand toe-to-toe with enemies, tank their hits, and outlast them. This makes it ideal for two-handed weapon users, sword-and-board tanks, and even battle mages who need breathing room to cast spells mid-combat.
The armor cap in Skyrim is 567 displayed armor rating (providing 80% physical damage reduction), and heavy armor reaches this threshold more easily than light armor. With proper smithing, enchanting, and perks, a heavy armor user can hit the cap while still having enchantment slots free for offensive bonuses. That’s efficiency at its finest.
Another advantage? Heavy armor pairs naturally with the Conditioning perk, which eliminates the weight penalty entirely. Once unlocked, you’re carrying a full suit of Daedric plate that weighs nothing, freeing up carry capacity for loot and potions. Light armor users can’t say the same.
Understanding the Heavy Armor Skill Tree
The heavy armor skill tree contains 8 perks spread across 5 tiers, each designed to enhance your tankiness in different ways. Progression through the tree unlocks damage mitigation, stamina benefits, and even offensive capabilities. Here’s the breakdown.
Essential Perks Every Heavy Armor User Should Unlock
Juggernaut (Rank 5) is the foundation of the tree. Each rank increases armor rating by 20%, stacking up to 100% at max rank. This perk is non-negotiable, take all five ranks as soon as possible. The boost applies to your total armor rating, not just the base value, making it exponentially stronger as you upgrade your gear.
Conditioning eliminates the weight of worn heavy armor, which is a game-changer for inventory management. No more choosing between carrying a full set of Dragonplate or picking up that enchanted warhammer. This perk should be prioritized by level 50 at the latest.
Reflect Blows returns 10% of melee damage back to attackers when wearing a full set of heavy armor. It’s situational but satisfying, especially against swarms of weaker enemies. Bandits and draugr essentially kill themselves while you stand there menacingly.
Cushioned halves the damage taken from falling, and while it sounds niche, it saves lives during dragon fights and mountain exploration. It’s a one-point investment that prevents frustrating deaths from bad jumps or getting ragdolled off cliffs.
Tower of Strength grants 50% bonus armor rating when wearing a full heavy armor set plus a shield. If you’re running a sword-and-board build, this perk pushes you well past the armor cap, letting you redirect enchantments toward offense or utility.
Perks to Skip and Why
Well Fitted reduces the stamina cost of power attacks and sprinting while wearing heavy armor. Sounds useful, but stamina management is rarely an issue if you’re using vegetable soup (which grants infinite stamina regeneration during combat) or enchanting gear with Fortify Stamina. Skip it unless you have spare perk points burning a hole in your pocket.
Matching Set provides a 25% armor bonus when wearing a complete set of heavy armor. It’s decent early on, but once you’re mixing Daedric pieces with unique artifacts like the Ebony Mail or Helm of Yngol, you’ll break the set bonus anyway. The flexibility of mix-and-matching outweighs the static bonus.
Best Heavy Armor Sets in Skyrim
Choosing the right armor set depends on your level, available resources, and whether you’re willing to grind smithing. Here’s a tier-by-tier breakdown of the best options.
Iron to Steel: Early-Game Options
Iron Armor is your starting point, literally. It’s cheap, available everywhere, and gets the job done for the first few hours. Don’t invest in upgrading it: you’ll replace it quickly.
Steel Armor is the first meaningful step up. It’s common enough to find or buy, and smithing it only requires the Steel Smithing perk. Upgrade a full set to Fine or Superior quality, and you’ll survive through level 15 comfortably. Steel Plate Armor offers even better protection and looks significantly cooler, but it requires the Advanced Armors perk to craft.
Orcish, Dwarven, and Ebony: Mid-Tier Powerhouses
Orcish Armor is the first set that feels genuinely tanky. It requires the Orcish Smithing perk and uses Orichalcum, which is abundant in mines across Skyrim. The greenish aesthetic isn’t for everyone, but the armor rating bump is undeniable. Communities on Nexus Mods offer texture replacers if the default look doesn’t appeal.
Dwarven Armor is easier to acquire than Orcish since Dwemer ruins are packed with scrap metal for smelting. The Dwarven Smithing perk unlocks it, and the set provides solid defense for levels 20-30. The brass color scheme has a steampunk vibe that’s grown on players over the years.
Ebony Armor is where things get serious. With a base armor rating second only to Daedric and Dragonplate, Ebony is endgame-viable if properly upgraded. It requires the Ebony Smithing perk and Ebony Ingots, which are rarer but farmable from mines like Gloombound Mine. Aesthetically, it’s the darkest and most intimidating set in the game.
Daedric and Dragonplate: Endgame Dominance
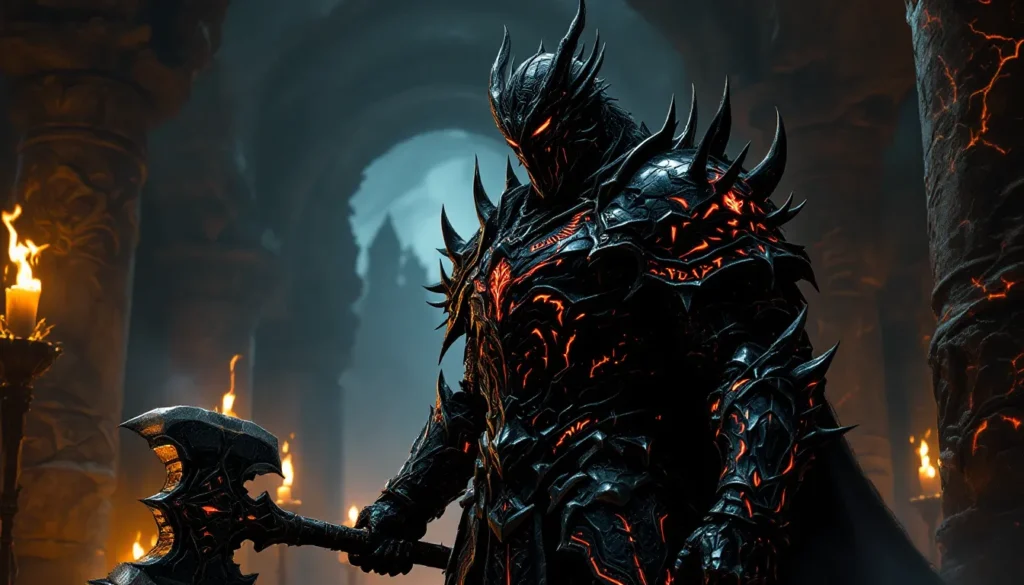
Daedric Armor has the highest base armor rating in Skyrim, edging out Dragonplate by a few points. Crafting it requires the Daedric Smithing perk, Ebony Ingots, and Daedra Hearts (which you can buy from Enthir in the College of Winterhold after completing “The Black Star”). The spiked, demonic aesthetic screams “final boss energy.”
Dragonplate Armor requires Dragon Smithing and Dragon Scales, which you’ll accumulate naturally by hunting dragons. It’s slightly lighter than Daedric and has marginally lower armor rating, but the difference is negligible once you hit the armor cap. Choose based on looks, Dragonplate has a more refined, skeletal design compared to Daedric’s brutalist spikes.
Unique and Artifact Heavy Armor Pieces Worth Collecting
Ebony Mail (Daedric artifact from Boethiah’s quest) grants poison damage aura and muffle. Pair it with any heavy armor helmet, gauntlets, and boots for a hybrid stealth-tank build.
Helm of Yngol (found in Yngol Barrow) provides frost resistance and looks eerie with its glowing blue eyes. It’s a solid early-game helmet before you craft endgame sets.
Spellbreaker (Daedric artifact shield from “The Only Cure”) blocks up to 50 points of spell damage, making it essential for mages and dragon fights. Even non-shield users should keep it on hand for caster-heavy dungeons.
Ahzidal’s Armor of Retribution (Dragonborn DLC) reflects damage and pairs beautifully with the Reflect Blows perk. Wear the full set for bonus enchanting buffs, or mix pieces into other sets for utility.
How to Level Heavy Armor Fast
Heavy armor skill increases based on damage taken while wearing heavy armor pieces. More pieces equipped = faster leveling. The skill gains per hit are small, so you’ll need sustained combat or clever tricks to level efficiently.
Combat Training and Enemy Engagement
The most organic way to level heavy armor is through regular combat. Engage enemies that deal consistent, moderate damage, mudcrabs and wolves are too weak, but draugr, bandits, and Forsworn are perfect. Let them hit you a few times before finishing them off.
Giant farming is surprisingly effective. Stand near a giant, block occasionally to avoid getting sent to space, and let it wail on you. Your armor skill will climb steadily, and your healing spells or potions get a workout too. Just don’t do this on Legendary difficulty unless you enjoy reloading saves.
Frostbite spiders in caves are ideal low-risk targets. Their poison damage counts toward skill gains, and they attack slowly enough that you can heal between hits. Clear most of a cave, leave one spider alive, and let it nibble you while you browse your phone.
Exploits and Power-Leveling Techniques
The Mudcrab method is classic but tedious. Find a mudcrab near water, let it attack you, and use healing spells to stay alive. Rubber-band your controller or weigh down your keyboard’s healing button, then walk away. You’ll return to a maxed heavy armor skill and restoration. It’s cheesy, but it works.
Bandit camp AFK leveling involves finding a low-damage enemy (like a weak bandit with a dagger), backing into a corner, and letting them attack while you auto-heal. Vigilants of Stendarr attacking vampires can also work, just stand between them and tank hits from both sides.
Atronach summoning lets you control the damage source. Summon a Flame Atronach, stand in its fire stream, and heal through the damage. Flame Atronachs deal consistent DPS without one-shotting you, making this one of the safer exploits.
Enchanting Your Heavy Armor for Maximum Protection
Enchanting turns good armor into godlike armor. The right enchantments can push you past the armor cap, add elemental resistances, and even grant regeneration effects that make you nearly immortal.
Top Enchantments for Survivability
Fortify Health is the simplest and most effective defensive enchantment. More HP = more mistakes forgiven. Enchant your chest piece with Fortify Health for an immediate survivability boost. At higher enchanting levels, you can add 50+ health per piece.
Resist Magic is invaluable against mages, dragons, and any enemy spamming spells. Heavy armor already handles physical damage, but magic bypasses armor rating entirely. Enchant a helmet or shield with Resist Magic to patch this weakness. Stacking multiple pieces can grant 70-85% magic resistance before potions or the Alteration perk tree.
Fortify Health Regeneration is underrated but powerful. It effectively grants passive healing during and after combat, reducing potion dependency. Enchant your boots or gloves with this, and you’ll notice the difference during prolonged dungeon crawls.
Resist Fire/Frost/Shock are situational but critical for specific encounters. Dragons, Dwemer automatons, and mages all lean heavily on elemental damage. If you know what you’re facing (like a frost-heavy dungeon), swap in resist-enchanted gear for that element. Players who check Game8 for dungeon-specific enemy types can prepare enchantments accordingly.
Stacking Enchantments and Fortify Bonuses
Once you unlock the Extra Effect perk in the Enchanting tree (requires Enchanting 100), you can apply two enchantments per item. This is where heavy armor users pull ahead. Common combos include:
- Chest: Fortify Health + Fortify Stamina
- Helmet: Fortify Magicka + Resist Magic
- Gloves: Fortify Two-Handed + Fortify Heavy Armor (if using a Fortify Heavy Armor enchant from disenchanted armor)
- Boots: Fortify Stamina Regen + Resist Frost
- Shield: Fortify Block + Resist Magic
Fortify Smithing enchantments aren’t worn during combat but are critical for maximizing armor rating. Craft a dedicated Fortify Smithing set (helmet, gloves, chest, necklace, ring) alongside Fortify Smithing potions to push your gear improvements into the stratosphere. Using smithing potions dramatically enhances your upgrade potential.
Smithing Tips to Maximize Heavy Armor Rating
Smithing is the backbone of armor optimization. A Legendary-quality Daedric set vastly outperforms an unimproved Dragonplate set. Here’s how to squeeze every point of armor rating from your gear.
First, invest in the smithing perks relevant to your chosen armor type. Steel Smithing, Dwarven Smithing, Orcish Smithing, Ebony Smithing, and Daedric Smithing each unlock higher-tier improvements. Don’t skip intermediate perks unless you’re beelining for Dragonplate via the right side of the tree.
Craft a Fortify Smithing set using enchantments on your helmet, gloves, chest, necklace, and ring. Each piece can grant +25% or more smithing effectiveness at high enchanting levels. Combine this with Fortify Smithing potions (Glowing Mushroom + Sabre Cat Tooth is a common recipe) to stack multiplicative bonuses. A 150% smithing boost isn’t overkill, it’s standard practice for endgame crafting.
Improving armor at a workbench scales with your smithing skill and equipped bonuses. Each improvement tier (Fine, Superior, Exquisite, Flawless, Epic, Legendary) adds a percentage of the base armor rating. Legendary quality doubles the base value, so starting with high-base armor like Daedric or Dragonplate maximizes the final result.
Don’t forget to improve every piece of your set, including shields. A Legendary Daedric Shield contributes significantly to your overall armor rating, and the difference between an unimproved and Legendary shield can be 30+ armor points.
Finally, grab the Notched Pickaxe from the Throat of the World (it’s embedded in a rock near the summit). Equipping it grants a permanent +5 to Smithing, which is a small but free bonus. Every bit counts when you’re min-maxing.
Pairing Heavy Armor with the Right Builds and Playstyles
Heavy armor thrives in specific builds that leverage its tankiness. Here are the top three archetypes and how to optimize them.
Two-Handed Warrior Builds
This is the quintessential heavy armor build: a hulking warrior wielding a greatsword, battleaxe, or warhammer. You’re slow, deliberate, and hit like a freight train. Heavy armor lets you trade blows without flinching, and the Juggernaut perks amplify your survivability while you wind up devastating power attacks.
Perk priorities: Max out Two-Handed, Heavy Armor, and Smithing. Dip into Enchanting for weapon and armor bonuses. Ignore stealth entirely, you’re the opposite of subtle.
Race choice: Orcs are ideal thanks to their Berserker Rage ability, which doubles damage dealt and halves damage taken for 60 seconds. Nords are a close second with their frost resistance and Battle Cry fear shout.
Gear recommendations: Daedric or Dragonplate armor, a Legendary Daedric Warhammer enchanted with Absorb Stamina and Chaos Damage. Wear the Helm of Yngol or a fully upgraded Daedric Helmet depending on whether you need frost resist.
Sword and Shield Tank Builds
Tanks prioritize defense over offense, using shields to block, bash, and control crowds. Heavy armor synergizes perfectly with the Block skill tree, especially perks like Shield Wall and Elemental Protection. You’re nearly unkillable and can hold chokepoints against multiple enemies.
Perk priorities: Heavy Armor, Block, One-Handed, and Restoration for healing. Avoid spreading perks too thin, focus on these four trees.
Race choice: Imperials for their Voice of the Emperor calm ability and bonus gold find. Redguards work too, with their Adrenaline Rush stamina regeneration.
Gear recommendations: Spellbreaker shield (blocks 50 magic damage) or a Legendary Daedric Shield with Fortify Block and Resist Magic. Pair with a one-handed weapon like a Daedric Sword enchanted with Absorb Health. Analysts at RPG Site frequently rank sword-and-shield tanks among the most beginner-friendly Skyrim builds.
Battle Mage and Spellsword Hybrids
Magic users in heavy armor sound contradictory, but it’s devastatingly effective. You cast destruction spells with one hand, swing a weapon with the other, and tank damage that would flatten a pure mage. Heavy armor’s lack of magicka regeneration penalties (unlike in previous Elder Scrolls games) makes this viable.
Perk priorities: Destruction, Alteration (for magic resistance and armor spells), Heavy Armor, and Enchanting. Skip Conjuration unless you want atronachs as meat shields.
Race choice: Bretons for their innate 25% magic resistance and Dragonskin absorption ability. Dark Elves are solid too, with fire resistance and balanced stat bonuses.
Gear recommendations: Mix Ebony or Daedric armor with the Archmage’s Robes glitch (equip robes, then armor over them, patched in later versions but still works on older saves). Enchant heavily for Fortify Magicka, Magicka Regen, and Fortify Destruction.
Heavy Armor vs. Light Armor: Which Should You Choose?
The heavy armor versus light armor debate has raged since Skyrim’s 2011 launch. Both can hit the armor cap, both have strong perk trees, and both support viable endgame builds. So what’s the real difference?
Heavy armor prioritizes raw defense and stamina efficiency. Perks like Conditioning eliminate weight penalties, and Reflect Blows adds passive damage. It’s the better choice for players who want to face-tank damage, use two-handed weapons, or play sword-and-board tanks. Heavy armor also looks more intimidating, Daedric plate commands respect in a way that Dragonscale leather doesn’t.
Light armor rewards mobility and stamina regeneration. The Wind Walker perk grants bonus stamina regen when wearing light armor, which synergizes beautifully with dual-wielding and archery. Light armor weighs less even without perks, freeing carry capacity earlier. It’s ideal for stealth archers, assassins, and skirmishers who prefer hit-and-run tactics.
Reaching the armor cap is easier with heavy armor due to higher base values, but light armor gets there with fewer smithing and enchanting investments. If you’re playing on lower difficulties (Adept or below), the difference is negligible. On Legendary difficulty, heavy armor’s higher base rating provides a small but meaningful cushion during the early-to-mid game.
Eventually, the choice depends on playstyle. If you charge into melee and trade blows, go heavy. If you kite enemies, snipe from range, or backstab, go light. There’s no wrong answer, but heavy armor is more forgiving for new players still learning combat mechanics.
Common Mistakes to Avoid When Using Heavy Armor
Even experienced players make errors that undermine their heavy armor builds. Here are the pitfalls to avoid.
Neglecting to wear a full set. Many perks, including Tower of Strength and Matching Set, require wearing all heavy armor pieces. Mixing in light armor boots or a circlet breaks these bonuses. If you’re committing to heavy armor, commit fully.
Ignoring smithing upgrades. An unimproved Daedric set is weaker than a Legendary Ebony set. Don’t just craft endgame armor and call it done, improve every piece to Legendary quality using smithing potions and Fortify Smithing gear. The difference is night and day.
Skipping the Conditioning perk. Carrying 80+ pounds of armor cripples your movement speed and stamina until you unlock Conditioning. Prioritize this perk by level 50, or suffer constant encumbrance.
Over-investing in armor rating past the cap. Once you hit 567 displayed armor rating (667 with a shield), additional points do nothing. Redirect your enchantments toward health, stamina, magic resistance, or offensive bonuses instead of stacking more Fortify Heavy Armor.
Forgetting magic resistance. Heavy armor handles physical damage effortlessly but does nothing against spells. Mages, dragons, and Dwemer constructs will melt you if you ignore Resist Magic enchantments or the Alteration tree’s Magic Resistance perks.
Not leveling the skill actively. Heavy armor levels through taking hits, but if you’re one-shotting enemies at range, your skill won’t progress. Intentionally let enemies hit you during fights to build the skill naturally. Don’t wait until endgame to realize you’re still at Heavy Armor 40 while wearing Daedric plate.
Conclusion
Mastering heavy armor in Skyrim transforms you into an unkillable juggernaut capable of withstanding anything the game throws at you. From early-game steel sets to endgame Daedric plate, the progression feels rewarding, and the perk tree offers meaningful choices that amplify your tanking power. Pair it with smart smithing, strategic enchantments, and build-specific optimizations, and you’ll dominate Legendary difficulty without breaking a sweat.
Whether you’re cleaving through dungeons as a two-handed berserker, holding the line as a shield-wielding tank, or blending magic and melee as a battle mage, heavy armor provides the foundation for Skyrim’s most durable builds. Now suit up, hit the armor cap, and show Alduin what real resilience looks like.